
A methodic workflow is the core of creating complex animations and not getting lost in the labyrinth of keyframes and files. Over the years I have continuously upgraded how I order, structure and work with files, layers and assets. This page is dedicated to showing what works for me and what I have implemented over the years but it’s ever-evolving for clarity, conciseness and ease.
First off if it’s a passion project it is somewhat directionless to start. I will scroll through Instagram, dribble, and Behance. This gets the creative juices flowing, and after not so long I will get a brief idea of something I think could look cool and work.
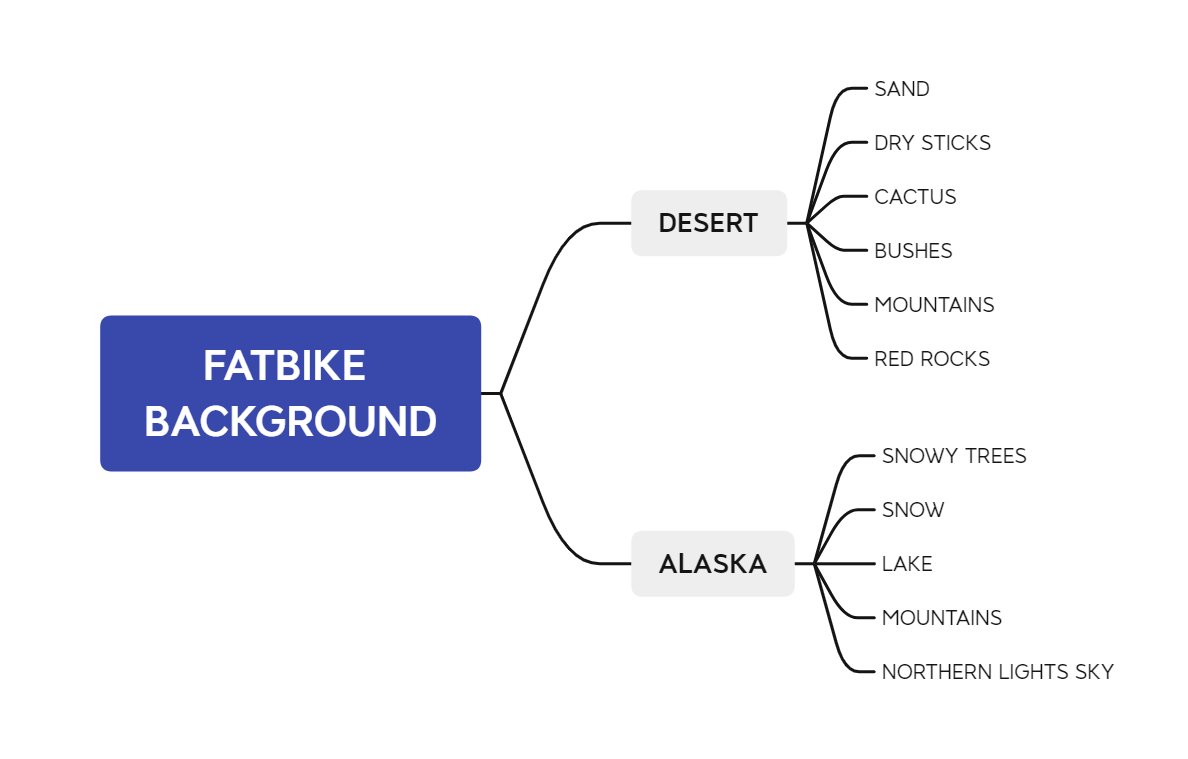
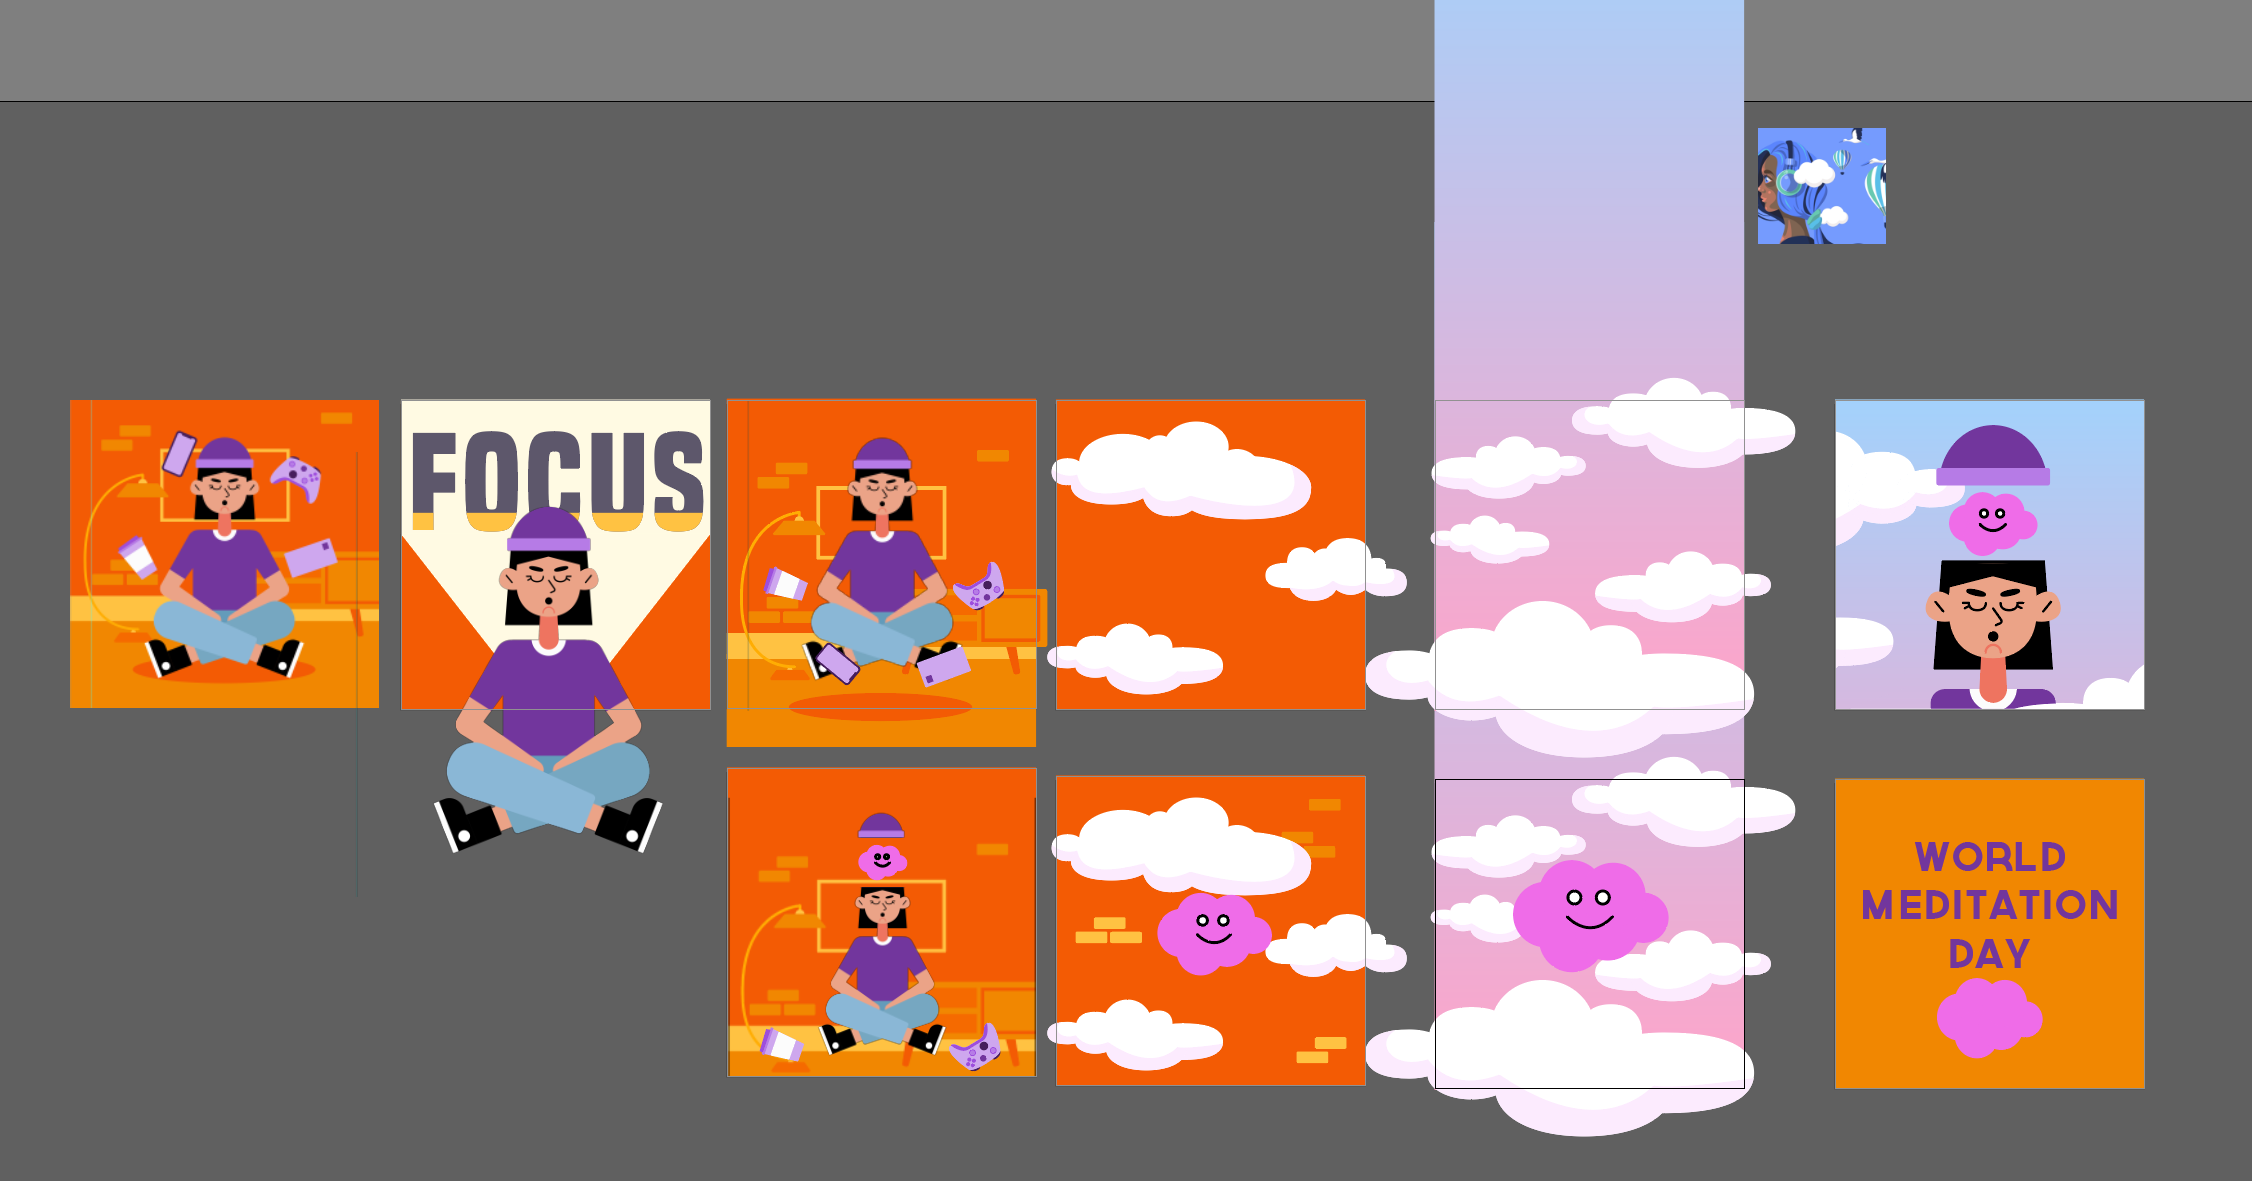
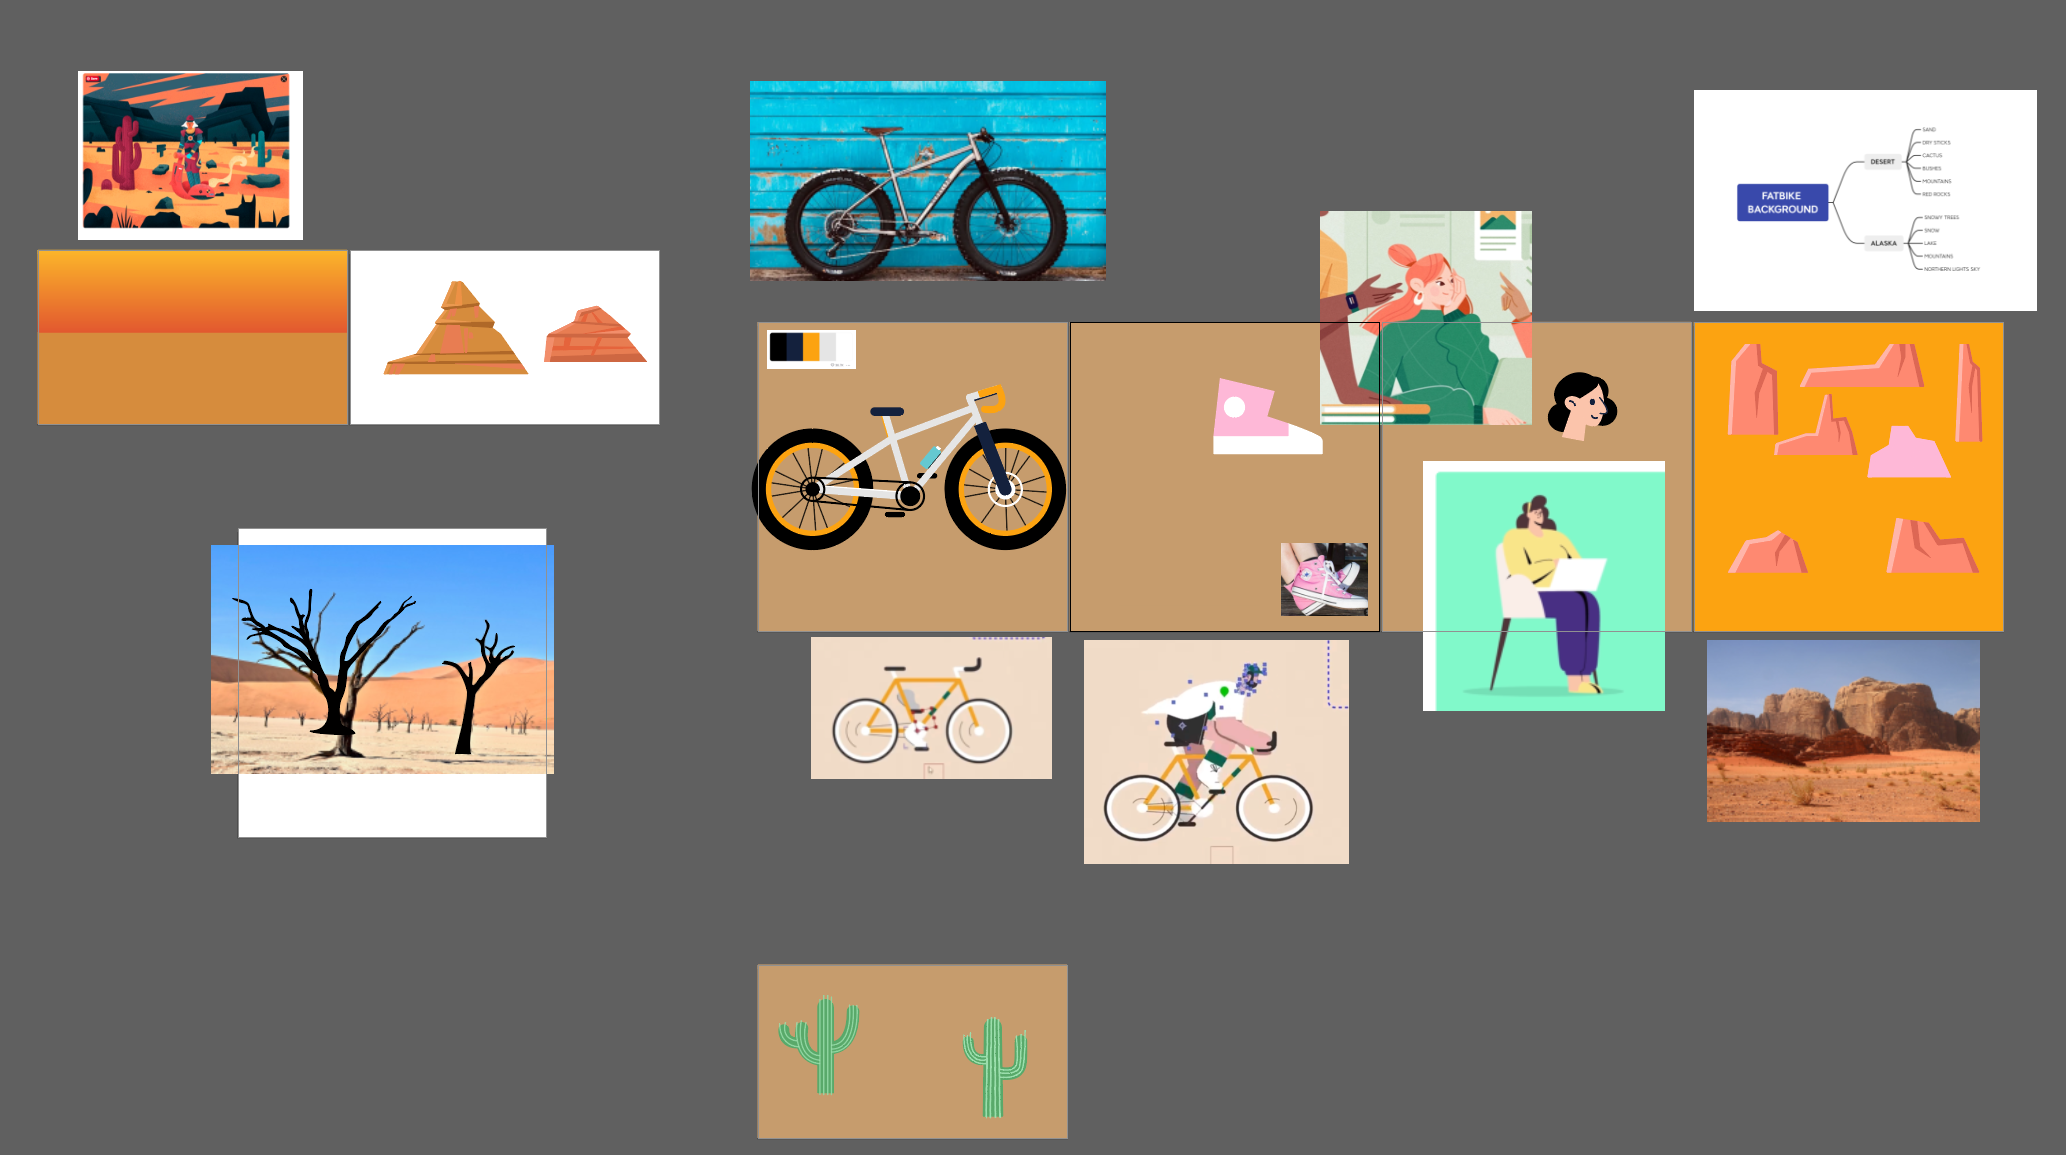
From here I will go into XMind and start mind-mapping out ideas, themes, and assets. Below is an example where I have already got the main idea down and looking to fill the scene with relatable objects.
Inspiration is the crux of any animation, as Austin Kleon says – ‘steal like an artist’. I have largely gotten to where I am through re-creating great work, this is the key to the beginning stage of learning any craft – standing on the shoulder of giants is a must to get to the highest level in your career. However, there is a time and place, now that I feel I am proficient in both designing and animating I always like to take influence but introduce my own themes and diversity into what I’m doing to hopefully create a unique piece I can call my own; if I feel that I have had a major influence from another piece I always credit the creator.
Once I have a rough idea of what I want to animate I go straight into Dribble, searching for themes and animations that are related to the concept I am eager to create.
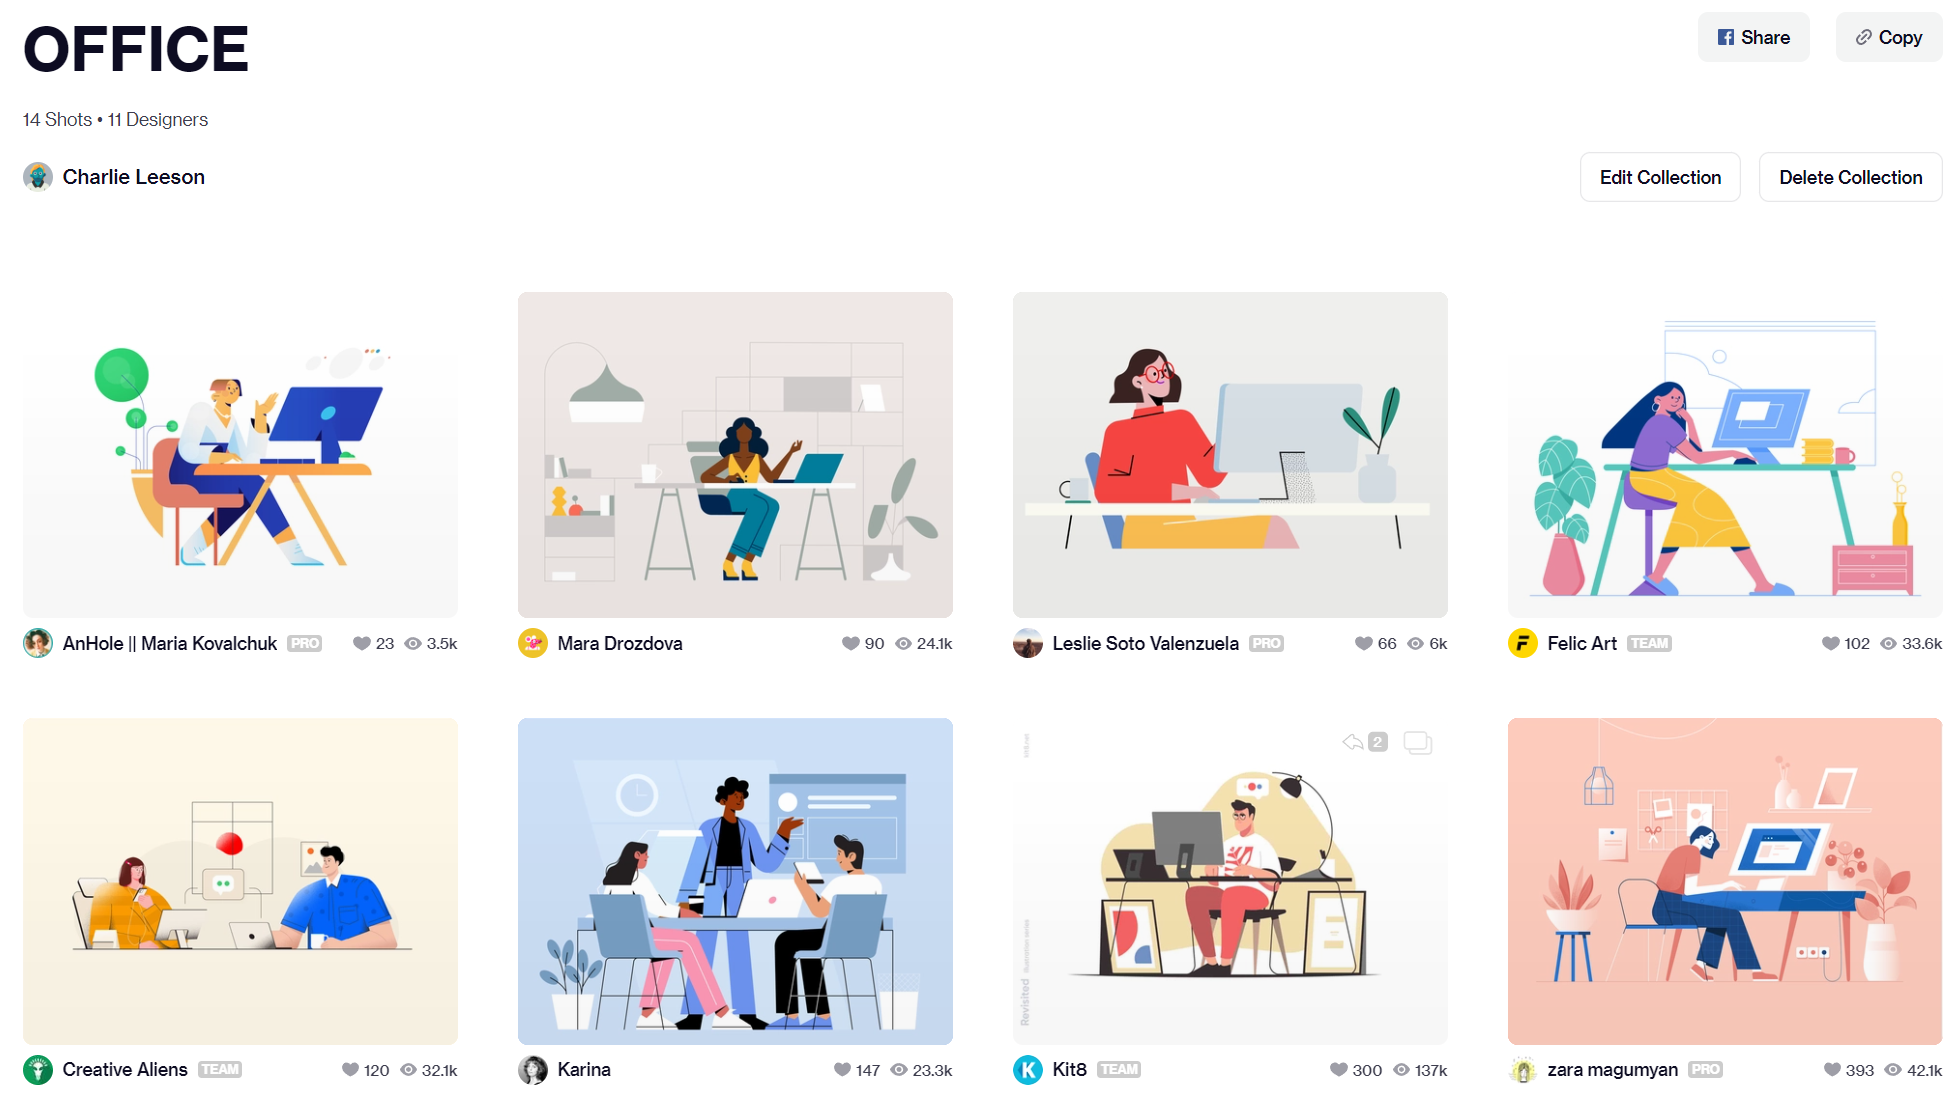
Dribble is exceptional as you can create boards for different projects. In the example above I have collected all the most stylish related computer desk designs, as well as ones which are animated beautifully.
My brain works best when I scatter ideas and references all in one place.
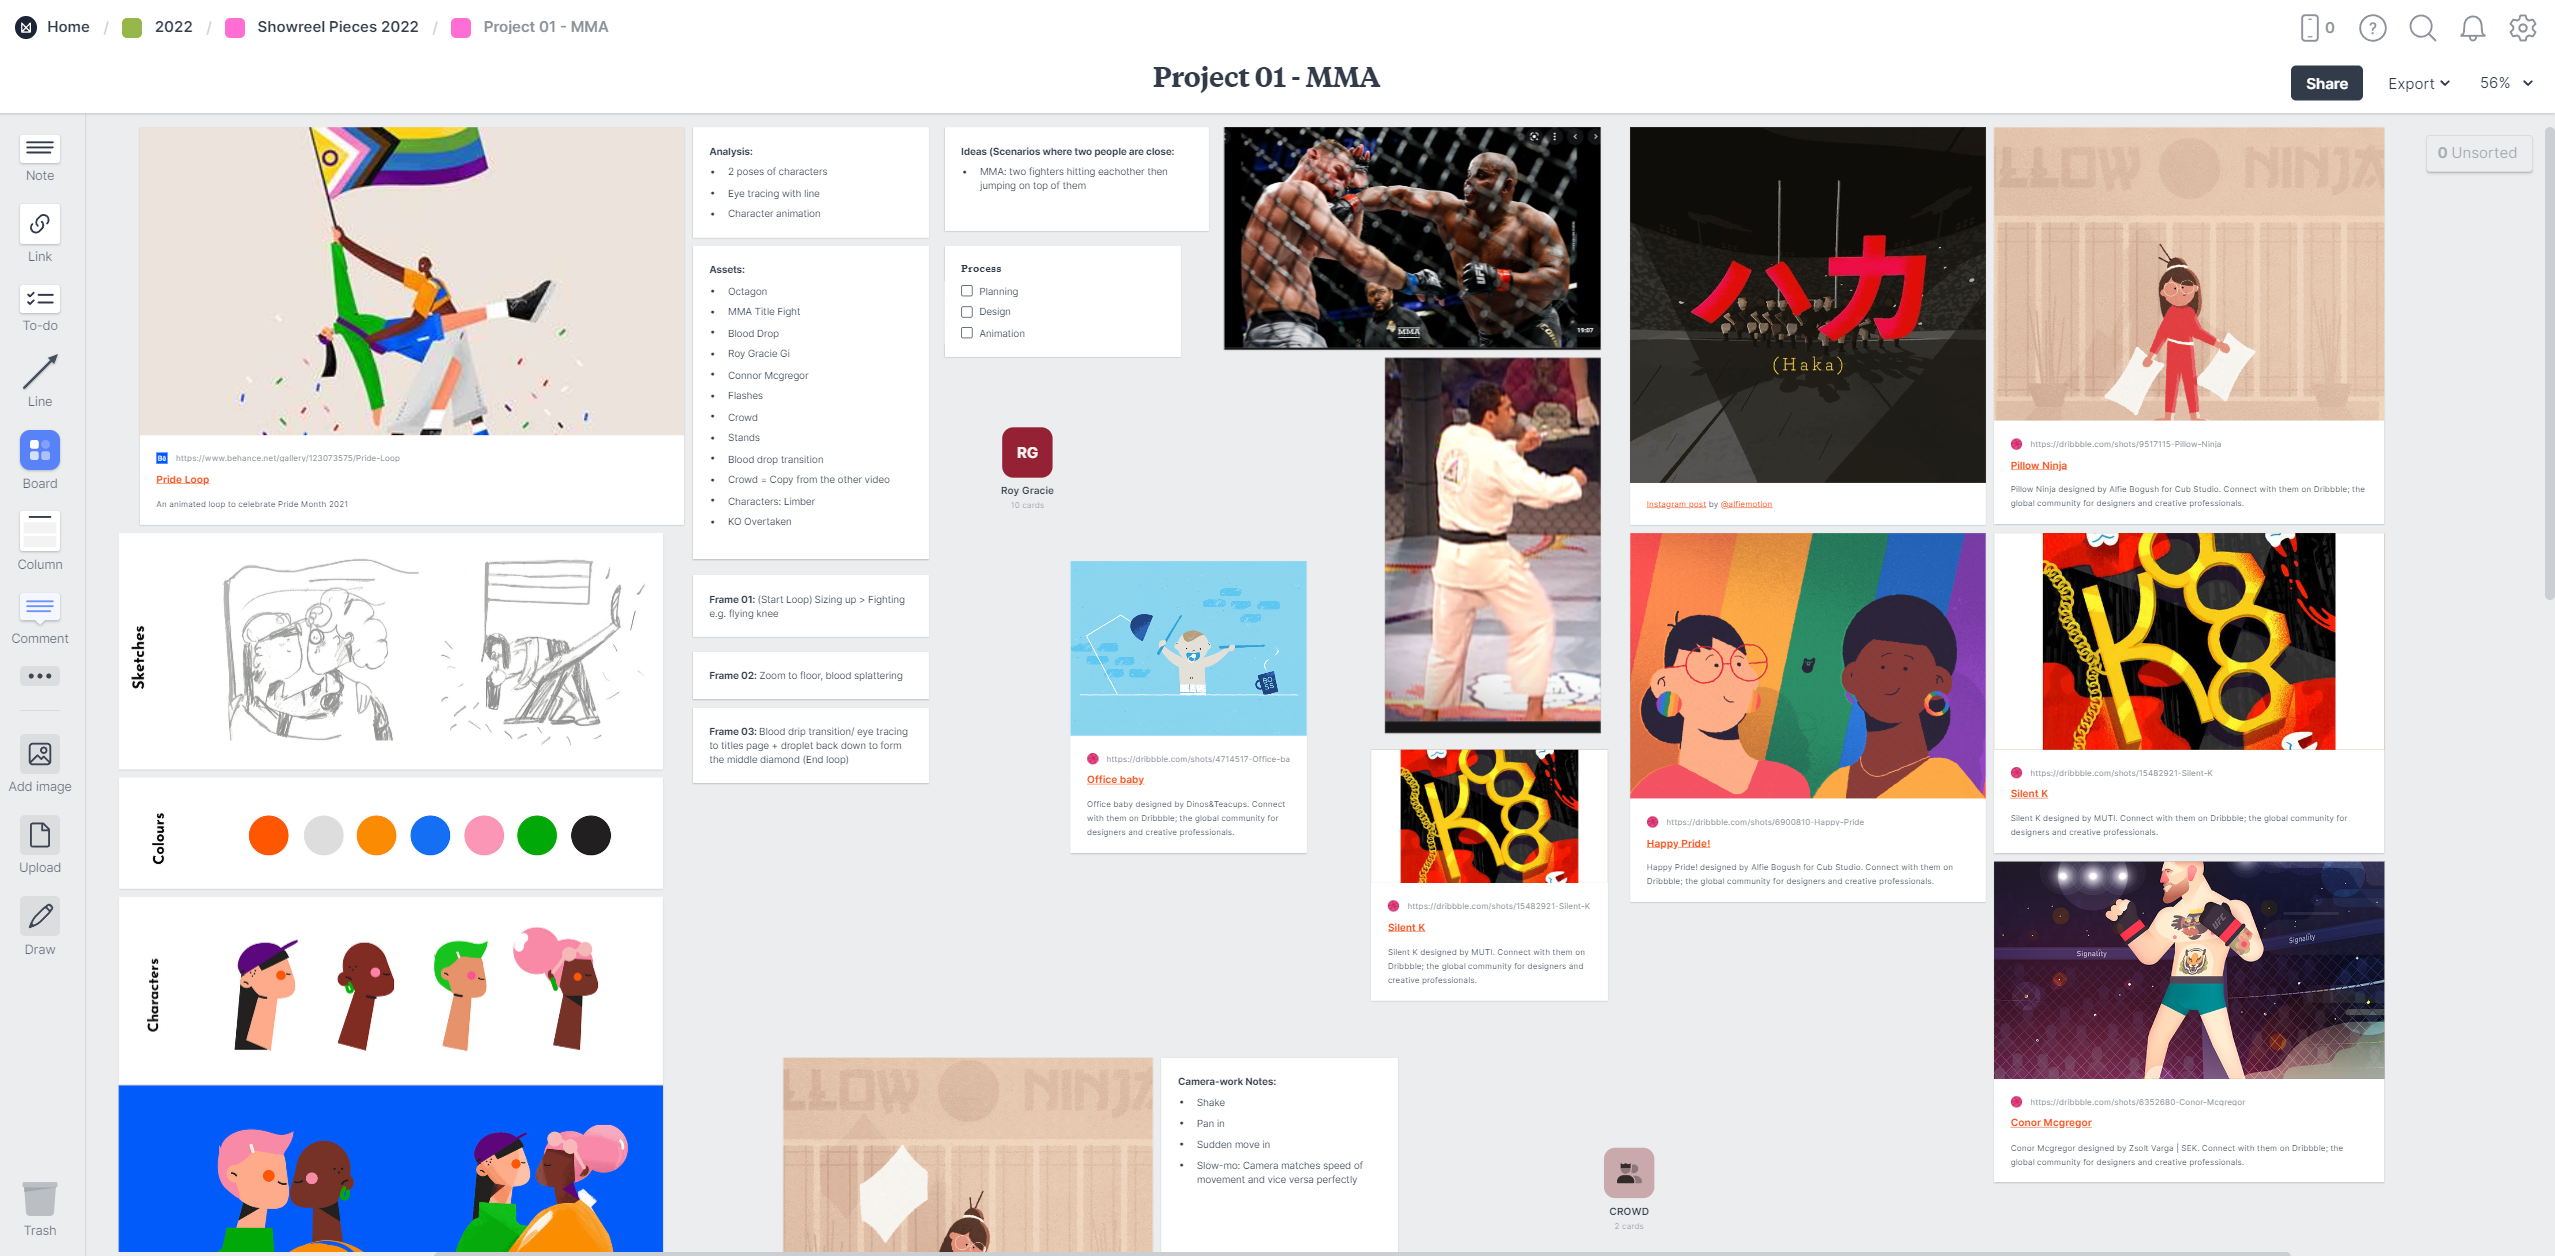
Milanote is perfect for this – a versatile programme in the never-ending bank of motion design tools. I gather all my ideas and inspo into one big collage here.
Once I feel the planning stage is complete I hop straight into illustrator where I will start designing all my assets.
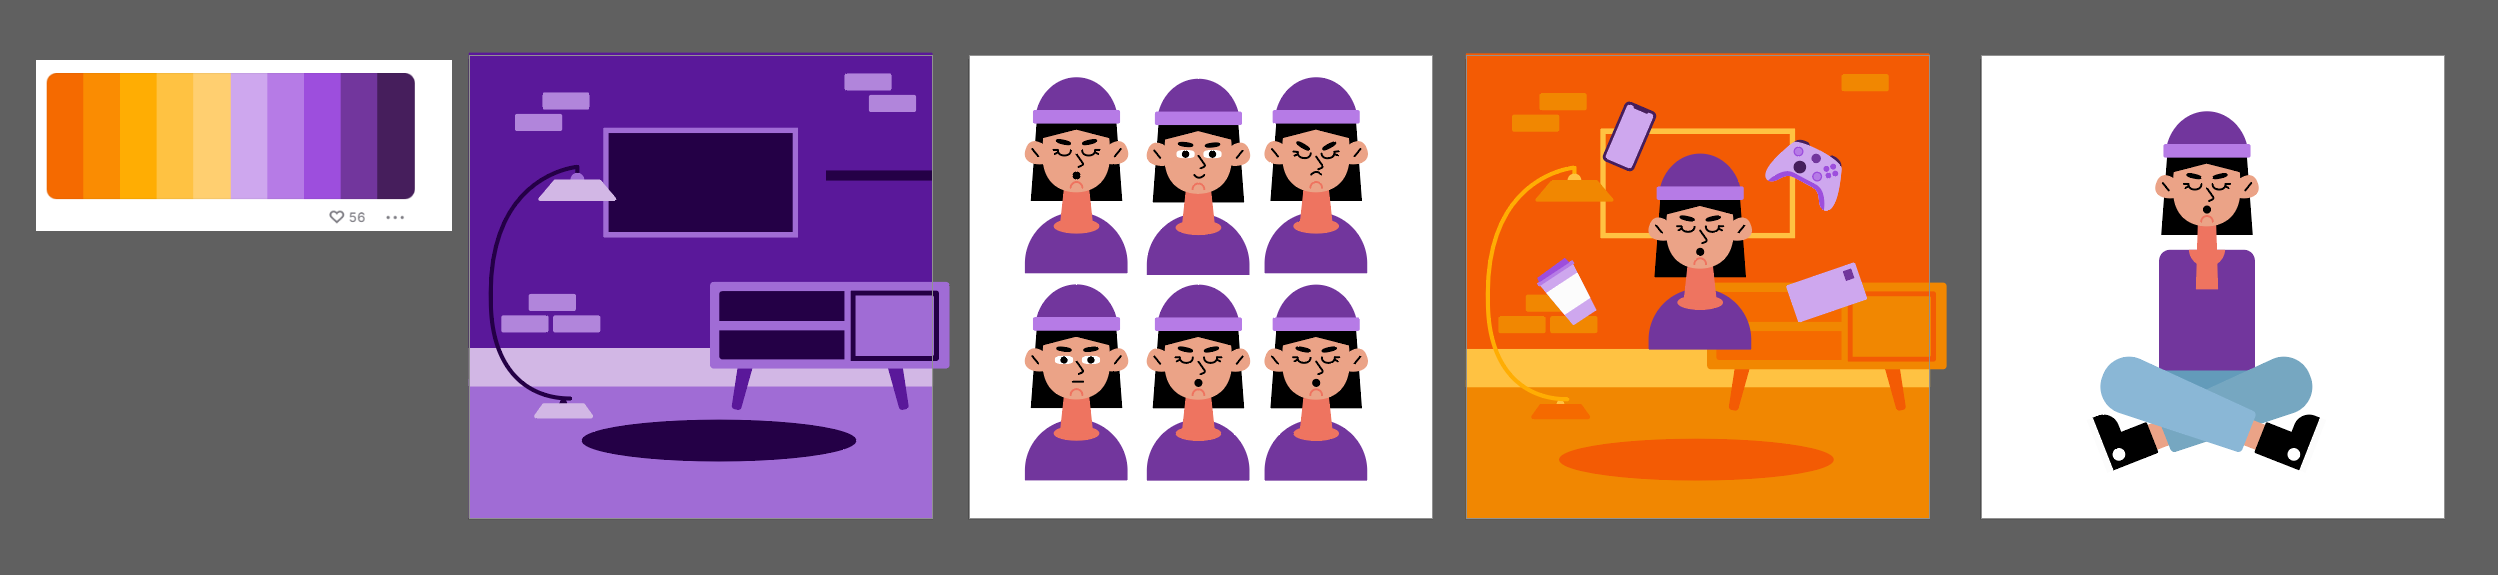
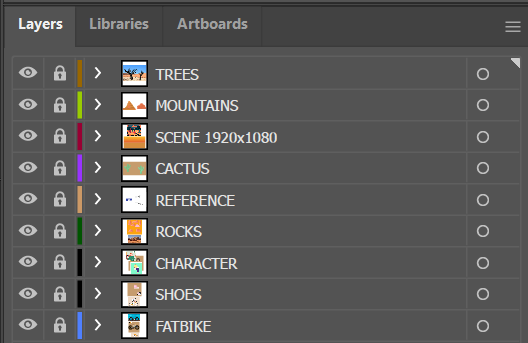
Using artboards efficiently and being organised is really important here, as it will make the transfer into After Effects either a piece of cake or a shutter-island nightmare.
First off I have to take my hat off to BATTLEAXE, Overlord has revolutionised the switch from Ai to Ae and it is worth every penny; I use it in all my projects. Once in After Effects I use a myriad of plugins and scripts, these just make the impossible possible. I’m a firm believer in using tools to speed up your workflow; with the caveat of learning the foundations first. Understanding how something works is important, then using tools to make the experience easier is a must if it works.
I will not go into great depth here as I could go on forever, so here is a brain-dump of everything animation: Eye tracing. Type animators. 12 animation principles. Ben Marriot. Grain. Textures. Mattes. Cub studio. Elastic Studio. Buck. Easing. Limber. Joysticks’n’sliders. Behance. Unsplash. Greyscalegorrila. ECAbrams. Workbench. Jake In Motion. Tapered lines. Secondary motion. Explosive shapes.
Special shout-out to School of Motion for all the top tier knowledge you have instilled into a padawan like myself – Joey Korenman you are a demi-god.
List of tools and plugins I use regularly:
– Limber
– Joysticks’n’sliders
– Flow
– Overlord
– FX Console
– Boombox
– True Comp Duplicator
– Motion 4
– Dojo shifter
– Cyclops
Right before this I use boombox to add SFX to my animations, currently, I am collaborating with sound design studios who have kindly offered their services for free and this is a game-changer. Having the right sound and music to accompany an animation is key for an engaging piece it makes it infinitely better, without it its like having cake without the icing.

The Media encoder chime marks the completion of any work. Unless you have an ongoing project like this.
And there you have it my process of creating my passion projects and client pieces.
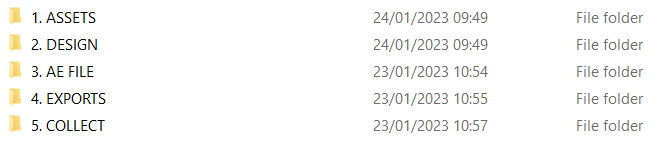
I can create animations using this file structure with clarity, everything falls into any one of the folders and it’s a logical chronological pass-through, stepping-stones to the final result.
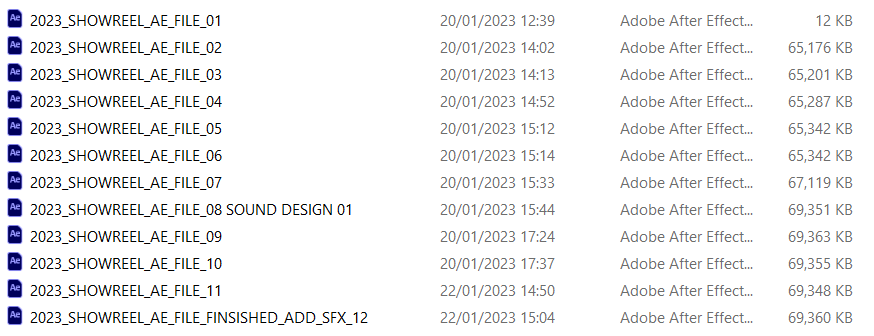
Gone are the days of lost files, corrupted saves and mental breakdowns. Using the increment and save shortcut I am confident that my AE project is backed up minimizing the need to re-do work due to errors.

In order to keep my files easily accessible throughout the different folders I synchronize everything with the AE iteration. Therefore I know what renders and collections are related to which AE file. This is great as if I ever need to come back to a project in the future, or client feedback means I need to backtrack a couple of versions I can be sure that I am using the correct files by looking at the render and hopping back into the easily locatable AE project.

Collecting is a must, once I have compiled a project all the files are in one master folder. With this, I back it up to G-drive, the computer hard drive and an external hard-drive – you can never be too paranoid when it comes to this stage.